Oculus Quest finally brings wire-free VR to the masses. Combined with the powerful tools provided by Unity, developing VR applications is easier than ever. Let’s see how to get started.
Tools
Unity 2019.3 (.1f1 used for this tutorial) with Android Build support.
- Unity Hub is the most convenient way to install different Unity versions and modules.
- Android SDK is required.
- You can install the Android SDK together with Unity or separately.
- If installing separately, point Unity to the SDK installation directory. Go to Edit->Preferences->External Tools, deselect “Android SDK Tools Installed with Unity” and enter the path of the SDK directory.
- Android NDK is not required, at least to get started.
- Java JDK 1.8 is required.
- The same comments as for the Android SDK apply.
Oculus Quest headset to test your creations.
Project Setup
- From Unity Hub, start a new 3D project
- Switch platform to Android
- Under File->Build Settings, select Android.
- Change Texture Compression to ASTC.
- Press Switch Platform.
- Enable VR (Unity 2019.2 only)
- This step is not required in Unity 2019.3, as the setting is deprecated. Built-in XR will retired in a future version of Unity and replaced by the Unity XR Plugin System (under Project Settings->XR Plugin Management).
- Edit->Project Settings->Player. Under the Android tab, find XR Settings. Enable “Virtual Reality Supported”.
- Under Virtual Reality SDKs, click on the + and select Oculus.
- Install XR Plugin Management (Unity 2019.3 only)
- Edit->Project Settings->XR Plugin Management. Press Install XR Plugin Management.
- After the installation completes, you will have the option to install different XR plugins. Install the Oculus XR Plugin.
- Under Plugin Providers, add Oculus Loader (using the + button).
- Under XR Plugin Management->Oculus, click Create to create an instance of the settings data (to make settings other than default available).
- Install Oculus Integration
- In the Asset Store, search for Oculus Integration. Download and import. Importing all assets might take a few minutes.
- Support for Vulkan API was added in v13 and it requires Unity 2019.3. To verify the Graphics APIs used by the project, go to Edit->Project Settings->Player. Under the Android tab, refer to Other Settings->Rendering->Graphics APIs section. Remove the Vulkan API if using Unity 2019.2 (using the – button).
- Android API level
- Oculus requires a minimum API level of 19.
- Edit->Project Settings->Player. Under the Android tab, find Other Settings. Select an API level >= 19.
- Set Oculus platform
- Oculus->Tools->OVR Platform Tool
- Target Oculus Platform = Oculus Quest
Device Setup
- Enable developer mode for the Oculus device
- In the companion app on your mobile device, go to Settings, select the Oculus headset, tap More Settings, Developer Mode, and turn on.
- If developing on Windows, install the Oculus ADB drivers
- Follow the instructions here.
- Connect to the device with ADB
- Plug the device into the PC with a USB cable.
- Find adb under Android SDK install folder/platform-tools.
- From a command prompt, run “adb devices”.
- The first time, the device will be displayed as unauthorized. From the headset, allow USB debugging from this computer.
- To connect via Wi-Fi, follow the additional instructions here.
Camera Setup
For the camera to be controlled by the headset position/rotation, the default Unity camera must be replaced. Without this step, the application will still launch, but the camera will be fixed, no matter how we move the headset.
- In the Project tab, search for OVRCameraRig. Once located, drag the prefab in the scene hierarchy.
- Copy the transform of the Main Camera (the camera that came with the Unity project by default) and apply it to the OVRCameraRig.
- Delete or disable the Main Camera.
- Select OVRCameraRig and find the OVR Manager component. Make sure that the Target Device is set to Quest.
Application Setup
This section is optional for the scope of this tutorial, but it’s listed for completeness. To be able to publish on the Oculus Store and use certain features of the Oculus API, the application needs to be registered.
- Go to dashboard.oculus.com.
- Sign in with your account.
- Create New Organization.
- Create New App.
- Copy the App ID.
The dashboard provides all the tools needed to submit an application to the Oculus Store, once you get to that point.
In the Unity project, go to Oculus->Platform->Edit Settings. Copy the App ID in the Inspector under Application ID.
Build and Run
Oculus->OVR Build->OVR Build APK and Run.
The Oculus device has to be connected. Otherwise, an error is reported.
If the build stops, check for errors in the Console. The errors are usually well described.
The build will take longer the first time. Be patient.
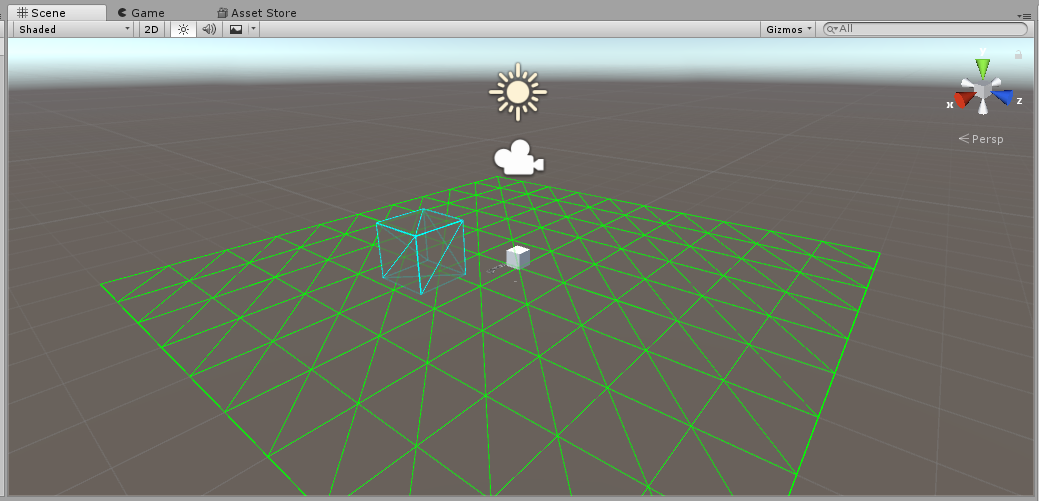
At the end of the build, the application is installed and started on the device. You should see the default Unity environment in the headset. This is not very exciting content, but we’ll add more stuff in a future tutorial.
To restart the application later, go to Library->Unknown Sources.
To uninstall the application, run “adb uninstall <packagename>” from the command line. The package name is the one displayed in the Library or under Oculus->Platform->Edit Settings in Unity (e.g., com.DefaultCompany.ProjectName).
Useful Links
https://developer.oculus.com/documentation/unity/unity-mobileprep/
Steps required to get started with mobile development. It points to other useful resources, some of which are listed below.
https://developer.oculus.com/documentation/unity/book-unity-gsg/
Getting started with Unity and Oculus. It explains how to enable VR in the Unity project.
https://developer.oculus.com/documentation/native/android/mobile-device-setup/
Device setup (developer mode, Windows drivers).
https://developer.oculus.com/documentation/native/android/mobile-adb/
Connect to the headset with ADB.
https://developer.oculus.com/documentation/unity/unity-tutorial/
Tutorial to build a first app in Unity.
https://developer.oculus.com/documentation/unity/unity-build-android/
Build settings.
https://developer.oculus.com/documentation/unity/unity-utilities-overview
Overview of Unity utilities, including OVRCameraRig and OVRManager.
Leave a Reply