
Objective
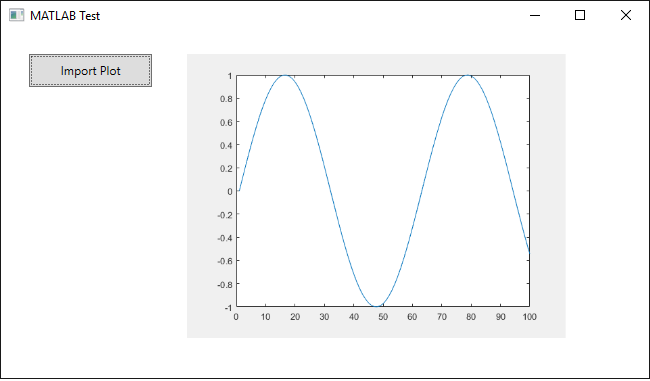
Generate a plot in MATLAB from a C# WPF program and import the plot into the WPF UI.
Tools
Microsoft Visual Studio
Visual Studio 2015 was used for this example.
MATLAB
Version R2016b was used for this example.
Steps
Plotting in MATLAB from C# is easy. You can just execute a plot command (refer to this blog post). However, the plot is displayed in a separate window, and there is no straightforward method to integrate a plot into the C# program’s UI.
As a workaround, we will generate a plot in MATLAB, get the bitmap data, transfer it to C#, rebuild the bitmap, and show it in a WPF image control.
As an alternative method, you can save the MATLAB plot to a file and import the file from C#. This method requires less code, but transferring data through files is generally slower.
Project setup
Create a new C# WPF program.
Call the window “MainWindow”.
Add a button (call it “importPlotButton”) and an image control (call it “plotImage”).
MATLAB code
Let’s take a look at what we need in MATLAB to get the bitmap data from a plot. Part of the code was taken from this Stack Overflow question.
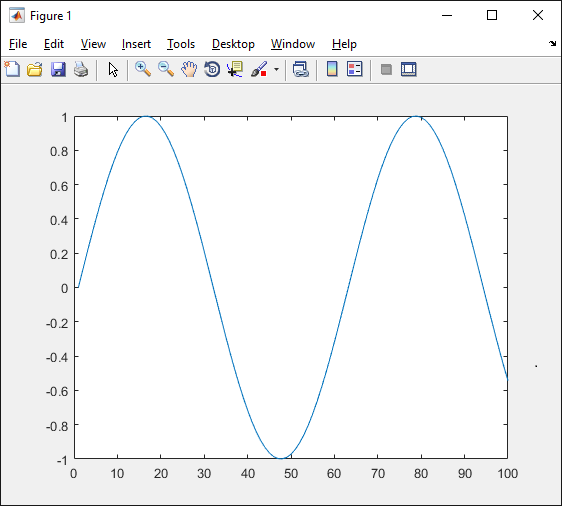
plotFunc = sin(linspace(0,10,100));
h = figure('visible', 'off');
plot(plotFunc);

F = getframe(h);
im = F.cdata; % get image as height x width x BGR

% Rearrange the bitmap data to RGB sequence pixel by pixel, row by row
im1 = flip(im, 3);            % flip the color data from BGR to RGB
im2 = permute(im1, [3,2,1]);  % put dimensions in this order: color, width, height
imFlat = reshape(im2, 1,[]);  % flatten to one-dimensional array

imSize = size(im);
We create the plot and get the bitmap data with getframe. The rest of the code is just a rarrangement of the bitmap data to convert it to the format we’ll need in C#. In the end, the data is a sequence of pixels scanning the image row by row, and each pixel is a sequence of 3 bytes (R, G, B). The last line just stores the size of the image.
C# code to interact with MATLAB
First of all, we need to create a MATLAB object. We’ll put it in the window constructor. Refer to this blog post for details on how to add a reference to MATLAB.
private MLApp.MLApp matlab;

public MainWindow()
{
    InitializeComponent();

    // Create a MATLAB instance
    matlab = new MLApp.MLApp();
    matlab.Visible = 0; // keep MATLAB in the background
}
We’ll also add code to shut down MATLAB when the program is closed.
private void Window_Closing(object sender, System.ComponentModel.CancelEventArgs e)
{
    matlab.Quit();
}
The rest of the code will go in the click handler for the button. First we execute the MATLAB code and retrieve the image size and image data. The image data is passed as a 2D array, and we’ll have to convert to 1D to be compatible with the bitmap conversion function we will use.
matlab.Execute(@"...copy the MATLAB code above here...");

// Retrieve variables from workspace
double[,] bitmapSize = matlab.GetVariable("imSize", "base") as double[,];
byte[,] bitmapBytes = matlab.GetVariable("imFlat", "base") as byte[,];

// Size of the bitmap
int bitmapHeight = (int)(bitmapSize[0, 0]);
int bitmapWidth = (int)(bitmapSize[0, 1]);

// Convert from 2D to 1D array
int length = bitmapBytes.GetLength(1);
byte[] bitmapArray = new byte[length];
for (int i = 0; i < length; i++)
    bitmapArray[i] = bitmapBytes[0, i];
C# code to convert the bitmap
At this point we have bitmapArray (content of the bitmap in serialized format), bitmapHeight and bitmapWidth. The next objective is to convert the byte array to a bitmap and then to a format that WPF accepts.
// Convert from byte array to image
Image bitmapImage = ImageFromRawRGBArray(bitmapArray, bitmapWidth, bitmapHeight);
Bitmap bitmap = new Bitmap(bitmapImage);

// Convert from bitmap to source
BitmapSource bitmapSource = ConvertBitmap(bitmap);

// Assign source to image
plotImage.Source = bitmapSource;
As you noticed, the code relies on two additional functions. The first one converts a byte array to an Image. The code can be found in this Stack Overflow post.
private Image ImageFromRawRGBArray(byte[] arr, int width, int height)
{
    var output = new Bitmap(width, height, PixelFormat.Format24bppRgb);
    var rect = new Rectangle(0, 0, width, height);
    var bmpData = output.LockBits(rect, ImageLockMode.ReadWrite, output.PixelFormat);
    var ptr = bmpData.Scan0;
    Marshal.Copy(arr, 0, ptr, arr.Length);
    output.UnlockBits(bmpData);
    return output;
 }
The second one converts a Bitmap to a BitmapSource, which can be used by WPF. The code can be found in this Stack Overflow post.
public static BitmapSource ConvertBitmap(Bitmap source)
{
     return System.Windows.Interop.Imaging.CreateBitmapSourceFromHBitmap(
         source.GetHbitmap(),
         IntPtr.Zero,
         Int32Rect.Empty,
         BitmapSizeOptions.FromEmptyOptions());
}
In the end, the program will accomplish this. The plot is displayed as part of the WPF UI.
Teja
Im unable to run the matlab code given. Shows the following error:
Undefined function ‘flip’ for input arguments of type ‘uint8’.
Error in plotc (line 9)
im1 = flip(im, 3); % flip the color data from BGR to RGB
Luca
I tested the code again, and I am able to run it without errors in MATLAB R2016b. What version are you using?