Objective
Build a simple augmented reality application that can be viewed through a Google Cardboard device.
Tools
Unity
The free edition is sufficient. Version 5.6.2f1 was used for this post.
Vuforia for Unity
It is downloaded as a Unity package. Version 6.2 was used for this post.
No need to download Google VR libraries separately. Vuforia supports Google Cardboard natively as of version 5.5.
Steps
We will not use Vuforia samples. We will set up the Unity project from Scratch.
1. Start a new Unity project
- Launch Unity
- Press New to start a new project
- Select 3D and name the project “VuforiaSample”.
2. Import the Vuforia library
- Open Assets -> Import Package -> Custom Package
- Find the package you downloaded earlier.
- When the import selection window opens, just press Import (import all items).
3. Replace the default camera with the Vuforia AR Camera
- Delete the “Main Camera” added by default.
- Under the Project tab, navigate to Vuforia -> Prefabs.
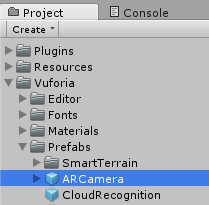
- Drag ARCamera to the scene Hierarchy.
- Save the scene: File -> Save Scenes. Name it “Main”.
4. Add an Image Target
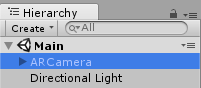
- Under the Project tab, navigate to Vuforia -> Prefabs.
- Drag ImageTarget to the scene Hierarchy.
- The target will show as a white plane, as no texture is defined for it yet.
- The camera is overlaid because both the target and camera are at the origin. Move the camera to Y= 2 to move it out of the way.
5. Create a target
- Open the Vuforia Target Manager.
- You need to be registered to use the Target Manager. So, create a new account if you don’t already have one.
- Click Add Database.
- Name: “VuforiaSampleDb”
- Type: Device
- Download one of the classic Vuforia targets here.
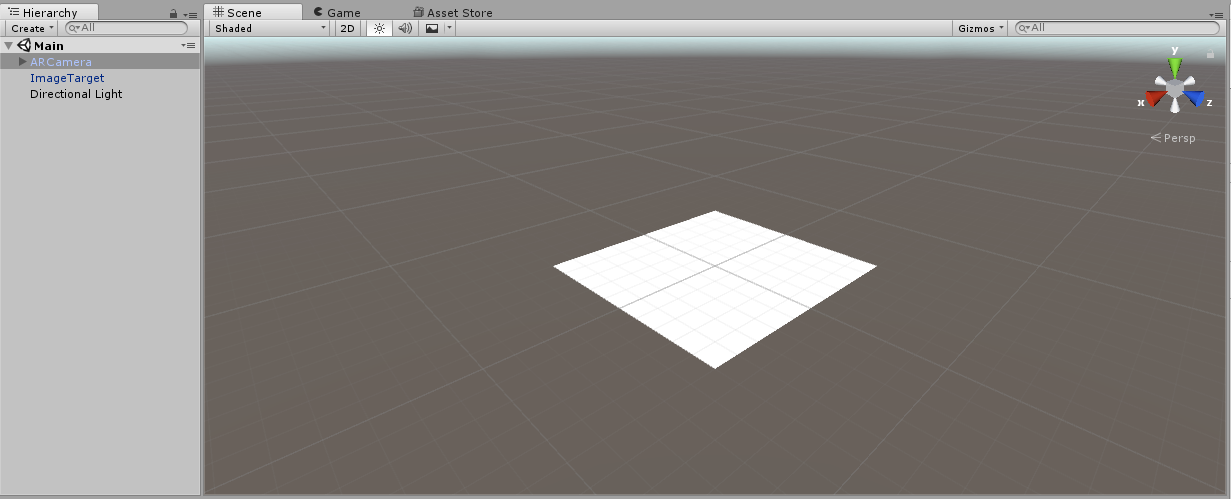
- Open the database and click Add Target.
- Find the target you downloaded and enter the other settings as below.
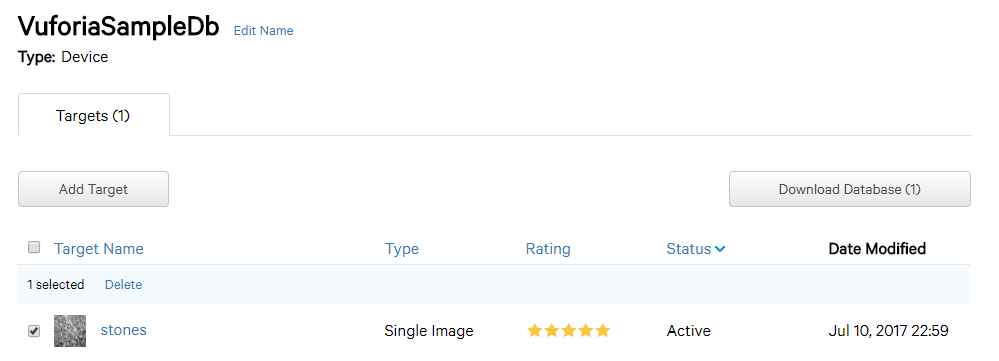
- The image will be processed. The database will look as follows in the end.
6. Download the target
- In the database view, clock Download Database.
- Select Unity Editor format.
- The file will download as a Unity package.
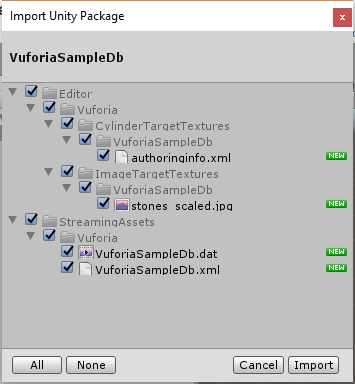
7. Import the target into Unity
- Open Assets -> Import Package -> Custom Package
- Find the image target package you downloaded earlier.
- When the import selection window opens, just press Import (import all items).
8. Apply the texture to the image target
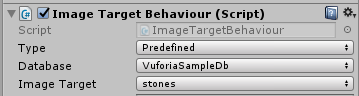
- Select ImageTarget in the scene Hierarchy.
- In the Inspector tab, go to Image Target Behavior.
- In the dropdowns, select Database: VuforiaSampleDb, Image Target: stones.
- The dropdowns are populated automatically when the target from database is imported.
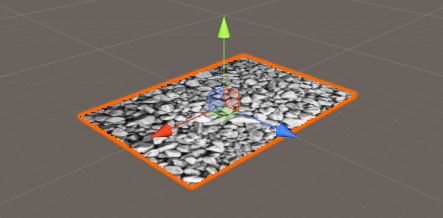
- The texture should appear on the target. If it doesn’t, do the following:
- In the Project tab, navigate to Editor -> Vuforia -> ImageTargetTextures -> VuforiaSampleDb, and select stones_scaled.
- In the Inspector tab, click on the settings gear and click on Reset.
- Select ImageTarget again in the scene Hierarchy and the texture will appear in the scene.

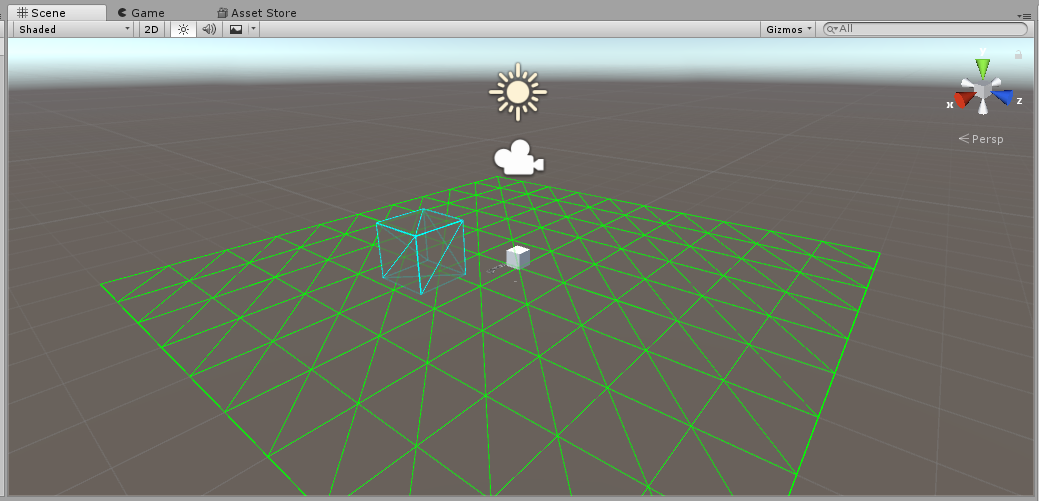
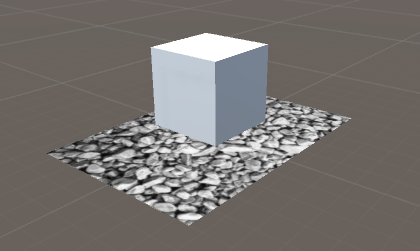
9. Add a 3D object in the scene
- This will be the object displayed as augmented reality. For this example, we are going to use a simple cube. However, you can use any 3D model (for example, you can download one from the Asset Store).
- Select GameObject -> 3D Object -> Cube
- Resize the cube to Scale X/Y/Z = 0.3, and move to position X = 0, Y = 0.2, Z = 0.
- Move the Cube under the ImageTarget in the Hierarchy. In this way, the object disappears if the target is lost during tracking.
10. Add an App License Key
- Go to the Vuforia License Manager site and follow the instructions.
- Once a key is created, in Unity navigate to Vuforia -> Configuration.
- In the Inspection tab enter the key.
- If you try to launch the application without a key, the rendering will default to a message warning to enter a key.

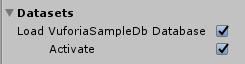
11. Enable the target
- Tracking of the target has to be explicitly enabled.
- Navigate to Vuforia -> Configuration.
- In the Inspection tab, find Datasets and activate the target.
12. Print out the target
- Print a copy of the target. The target will be the “link” between the real and the virtual world.
- You can pick the target size. It has to be at least large enough for the camera to track it correctly.
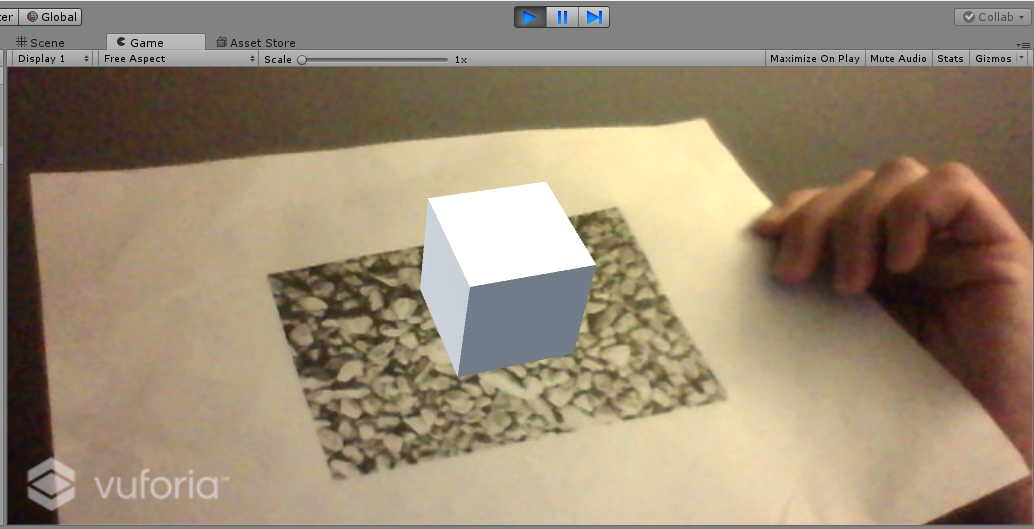
13. Launch the application
- Press the Play button in Unity.
- If you have a webcam, Vuforia will use it. This is a quick way to test your work without deploying on a device.
- Hold the printout of the target in front the camera and watch the cube appear!

14. Deploy to Android (Camera App)
- Go to File -> Build Settings
- Press Add Open Scenes to add the current scene to the buid.
- Select Android and press Switch Platform.
- Press Player Settings, go to the Inspector tab, find Settings for Android -> Other Settings -> Identification and enter a package name in the form com.Company.ProductName. This is required to generate the .apk file.
- Connect your favorite Android device to a USB port. In that way, the generated .apk file will automatically download to the device.
- To deploy to Android, you need the Android SDK and a JDK installed. Unity will ask for the paths during the build if not detected.
- Press Build and Run. Select where to save the .apk file on your drive.
15. Deploy to Android (Cardboard App)
- Deploying as a Google Cardboard application is very easy, as explained here.
- Go to Vuforia -> Configuration.
- In the Inspection tab, go to Digital Eyewear and select the following parameters from the dropdowns.

- Go to File -> Build Settings
- Press Player Settings, go to the Inspector tab, find Settings for Android -> Resolution and Presentation -> Orientation and set Default Orientation to Landscape Left.
- Follow all other configuration settings explained in step 14 for a regular camera app.
- Press Build and Run.
- Enjoy the application in your Cardboard viewer!
Recommended Reading
Developing AR Games for iOS and Android (ISBN: 1783280034)
Overview of Vuforia and how to use in Unity.
Augmented Reality for Android Application Development (ISBN: 1782168559)
How to create augmented reality applications using the Android API.
1 Pingback